EdgeBox: Proof of Concept Testing
Using EdgeBox requires just three lines of code to get you up and running on the edge. All you need is your laptop or a Linux box. Once installed, you can onboard cloudlets, run and deploy edge applications, and test locally without impacting your existing network infrastructure.
Watch this instructional video:
Prerequisites
Linux: Ubuntu 18.04 or macOS: 10.14 (Mojave) or later
EdgeXR account with login credentials
Docker installed. The EdgeXR Docker registry is used to connect EdgeBox to the EdgeXR Console. You will use the same EdgeXR login credentials to log into the Docker registry for MobilegeX.
Python3 installed
Step 1. Install EdgeBox locally on your laptop
At the terminal prompt, type
pip3 install edgebox. If you’ve already installed EdgeBox and need to upgrade, typepip3 install --upgrade edgebox.Log into your EdgeXR Docker registry by typing in
docker login -u <username> docker.edgexr.org. The Password prompt will appear.Once you enter your password, you should see a Login Succeeded message. If you were unsuccessful, try entering your credentials again.
Step 2. Create an EdgeBox
At the terminal prompt, type
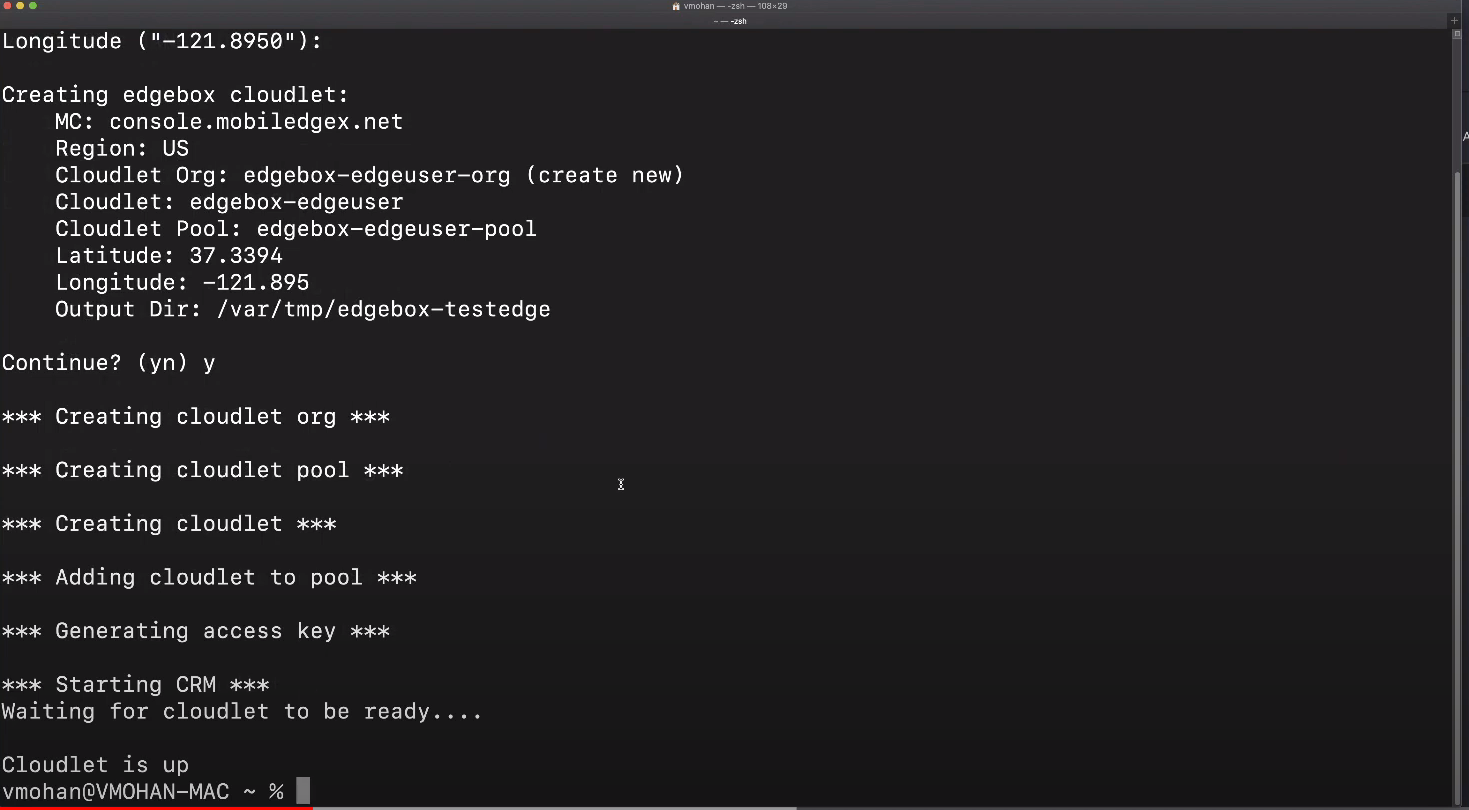
edgebox create testedge. You can give your EdgeBox any name. For this tutorial, we will name it testedge.A series of questions will appear in the terminal to complete the EdgeBox configuration process.
- Console Host: Use the same username you used to log in to your Docker login.- Region: Select your desired region closest to you.
- Cloudlet: Use the default or rename it.
- Latitude and Longitude: Provide one for your cloudlet, or use the default. EdgeXR will then map the geolocation of that cloudlet to applications that want to connect to it.
Note: If you reached this point and the download fails, go back and run the edgebox create command again.
Review your configuration, and if everything looks good, Type Y at the Continue? Prompt. The process to create your cloudlet will begin.
Once you see the Cloudlet is up at the Terminal prompt, the cloudlet is now running on your laptop.

EdgeBox commands
For a list of available EdgeBox commands, type edgebox --help.
The following commands are available:
$ edgebox --help
usage: edgebox [-h] [--debug] [--confdir CONFDIR] {create,delete,list,show,startall,version} ...
positional arguments:
{create,delete,list,show,github,startall,version}
sub-command help
create create edgeboxes
delete delete edgeboxes
list list edgeboxes
show show edgebox details
startall start all active edgeboxes
version display version
Step 3. Verifying the cloudlet
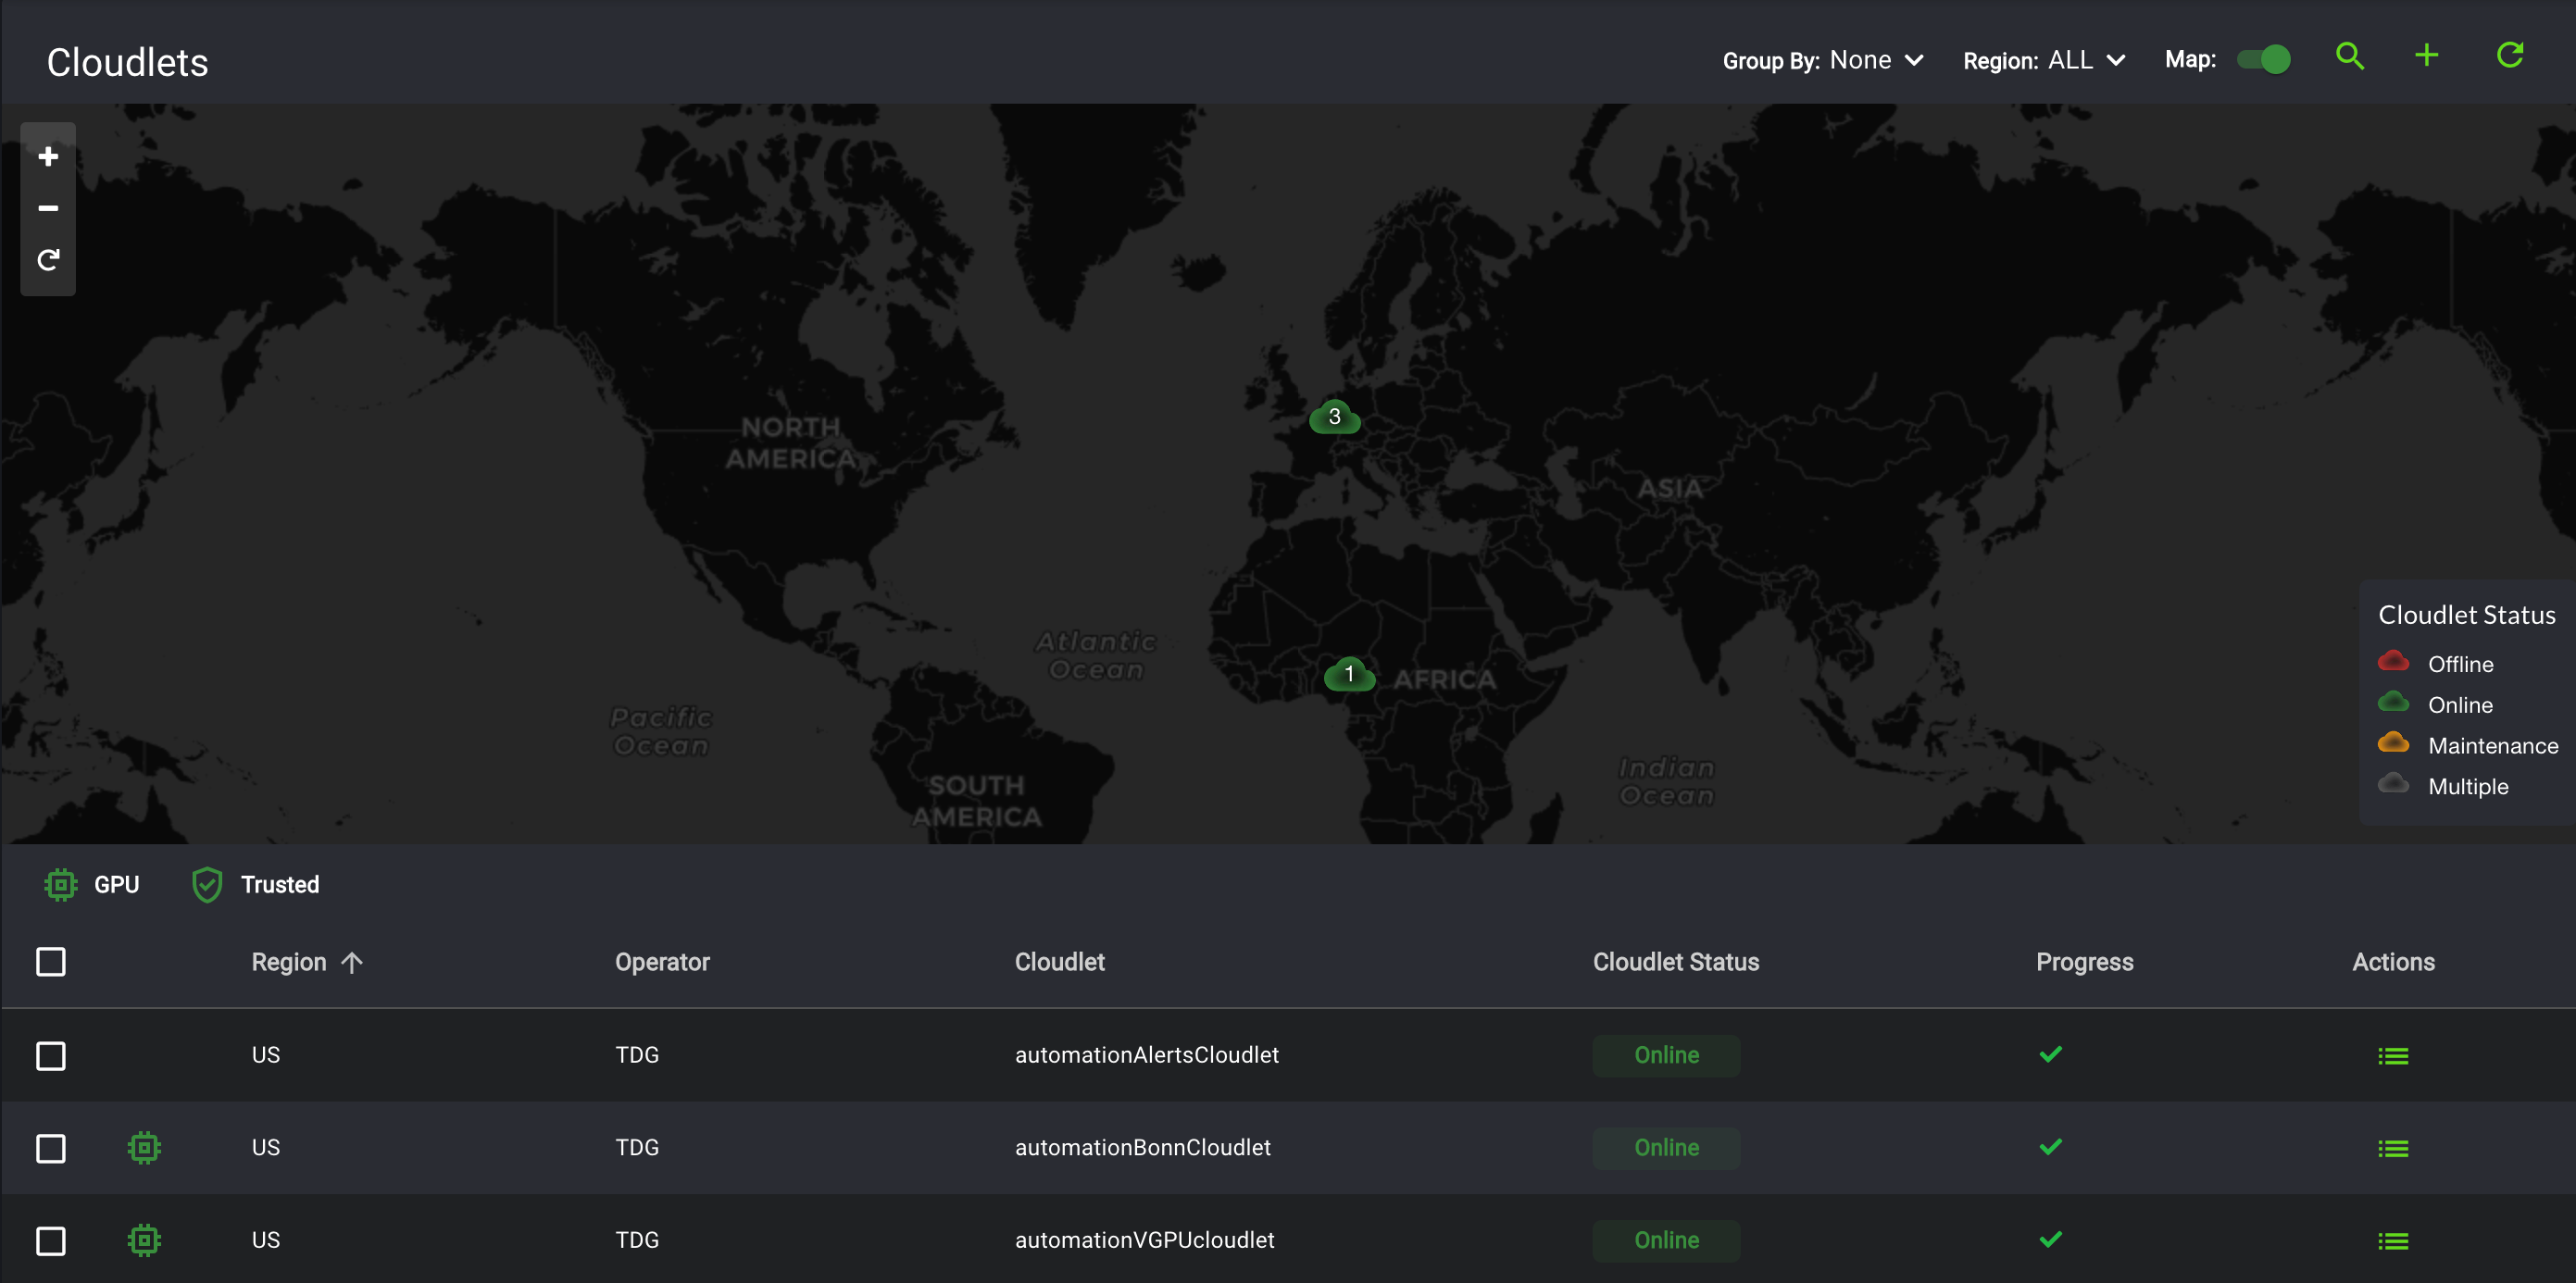
Log in to your EdgeXR Console.
Navigate to the Organizations page. You should see an Operator Organization already created, named edgebox-<cloudlet-name>-org.
Select Manage for that Operator Organization and navigate to the Cloudlets menu on the left navigation.
Scroll over to the region where you created your cloudlet and verify that it exists in the map view.

Step 4. Create an application to deploy onto the cloudlet
On the EdgeXR Console, return to the Organizations page, where you will create the Developers Organization.
Select the right arrow for Developers, as shown below.

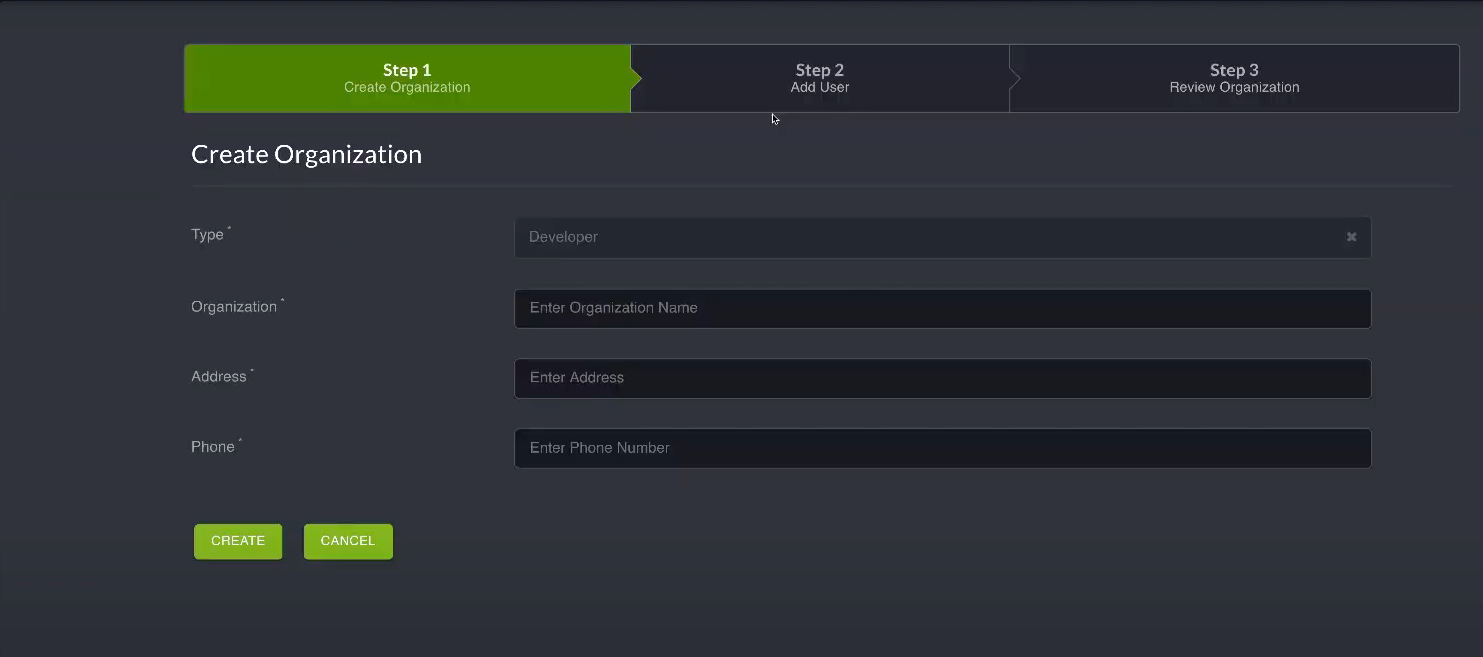
The Create Organization screen opens.

Populate all required fields, name your Developer Organization as edgeusertest, and select Create.
Optionally, you can add users to your Organization. Otherwise, skip this step.
Select Return to Organizations.
You are now ready to add your Developer Organization to the cloudlet.
Step 5. Add Developer Organization to cloudlet
Follow the steps below to add your Developer Organization to your cloudlet.
On the EdgeXR Console, with the Operator Organization selected, navigate to the Cloudlet Pools menu on the left navigation.
You can see from the Cloudlet Pools page that a cloudlet pool was added for your cloudlet, named edgebox-<cloudlet-name>-pool.Select the Actions menu, and scroll down to Invite Organization. The Organizations page opens.
For Organization, type in the name of the Developer Organization, which was edgeusertest that you previously created.
Select Create Invitation. The invite will be sent out and received by your Developer Organization.
Return to the Organizations page and switch to the Developer Organization by selecting Manage.
Navigate to the Cloudlet Pools menu, where under the Status column, you will see the Pending state. This is the pending invite sent from the cloudlet pool created previously for the Operator Organization.
Under the Actions menu, select Accept, and then select Yes to confirm.
After accepting the invite, the status within the Cloudlet Pools page will change to Accepted.
The Developer Organization can now create applications on EdgeBox.
Step 6. Create and deploy applications on EdgeBox
Return to the EdgeXR Console and select Apps on the left navigation. The Create Apps page opens.
Populate all the required fields.
- Region: Select the same region you specified in Step 2. Create an EdgeBox.
- App Name: Type in the app name as facedetection, which is the name of the sample app we provided in https://hub.docker.com/r/mobiledgexsamples/edge-face-detection
- App Version: Type in 2.2.
- Deployment Type: Select docker from the drop-down list.
- Image Path: Provide the image path as
registry.hub.docker.com/mobiledgexsamples/edge-face-detection:2.2.- Default Flavor: Select US>m4.small as the default size.
- Ports: Define the ports you wish to open. For the face detection sample app used, specify the first TCP port as 8008 and the second TCP port as 8011.
Select Create.
Navigate to the Apps page and verify the App definition was created successfully.
Once verified, under the Actions menu, scroll down and select Create Instance to spin up an application instance. The Create App Instances page opens.
Populate all required fields.
- Operator: Select edgebox-<cloudlet-name>-org.
- Cloudlet: Select edgebox-<cloudlet-name>.
- Auto Cluster Instance: Enable this option.
Select Create. You will see Progress status appear, showing the process of spinning up the application instance while it runs through the process of setting up a cluster and the docker container.

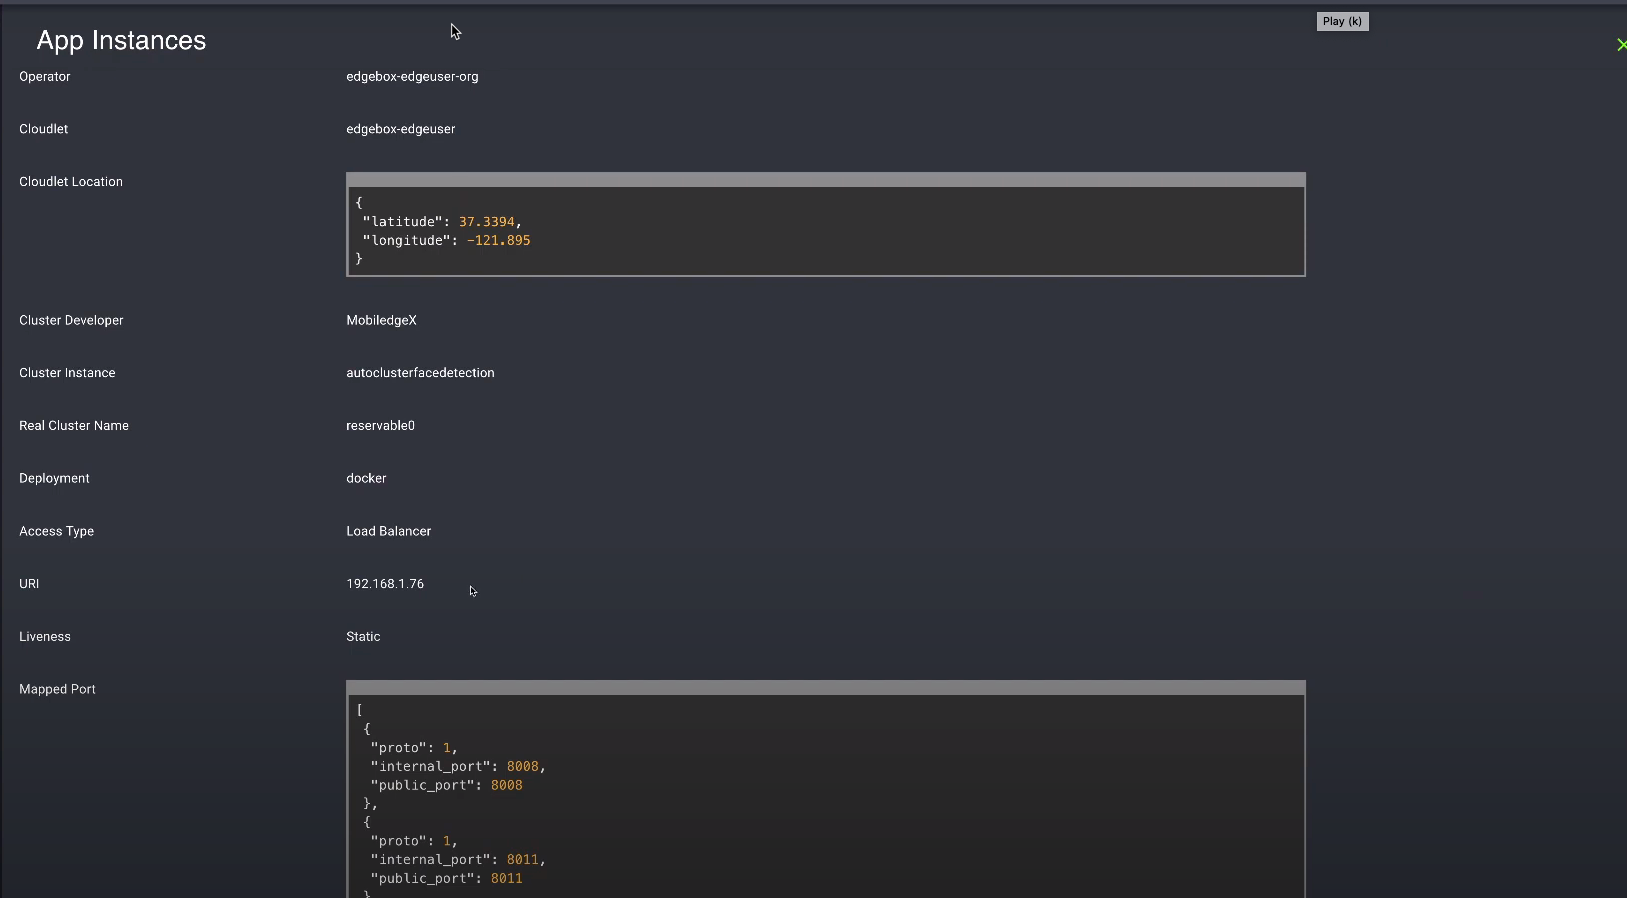
Navigate to the App Instances menu on the left navigation to open the Apps Instance page. You should see the application instance being monitored by the EdgeXR platform.
Select the App Instance, and the following page appears.

Scroll down the page until you see URI and copy and paste the URI address into a browser using port
8008.You should see the Computer Vision Face Detection application working.
Since this Docker instance runs locally, you can switch to a localhost:8008 where you can set up a pseudo HTTPS connection and use the webcam to run face detection.
That’s it! You have successfully set up EdgeBox.