Organizations and Users
Create an Organization and Manage Users
Note: Fields that contain an asterisk (*) are mandatory and require user input.
Before you can start creating and deploying cloudlets, you need to create an organization. You can think of an organization as a group of users on the EdgeXR platform tasked with creating and deploying cloudlets or managing the health of those cloudlets.
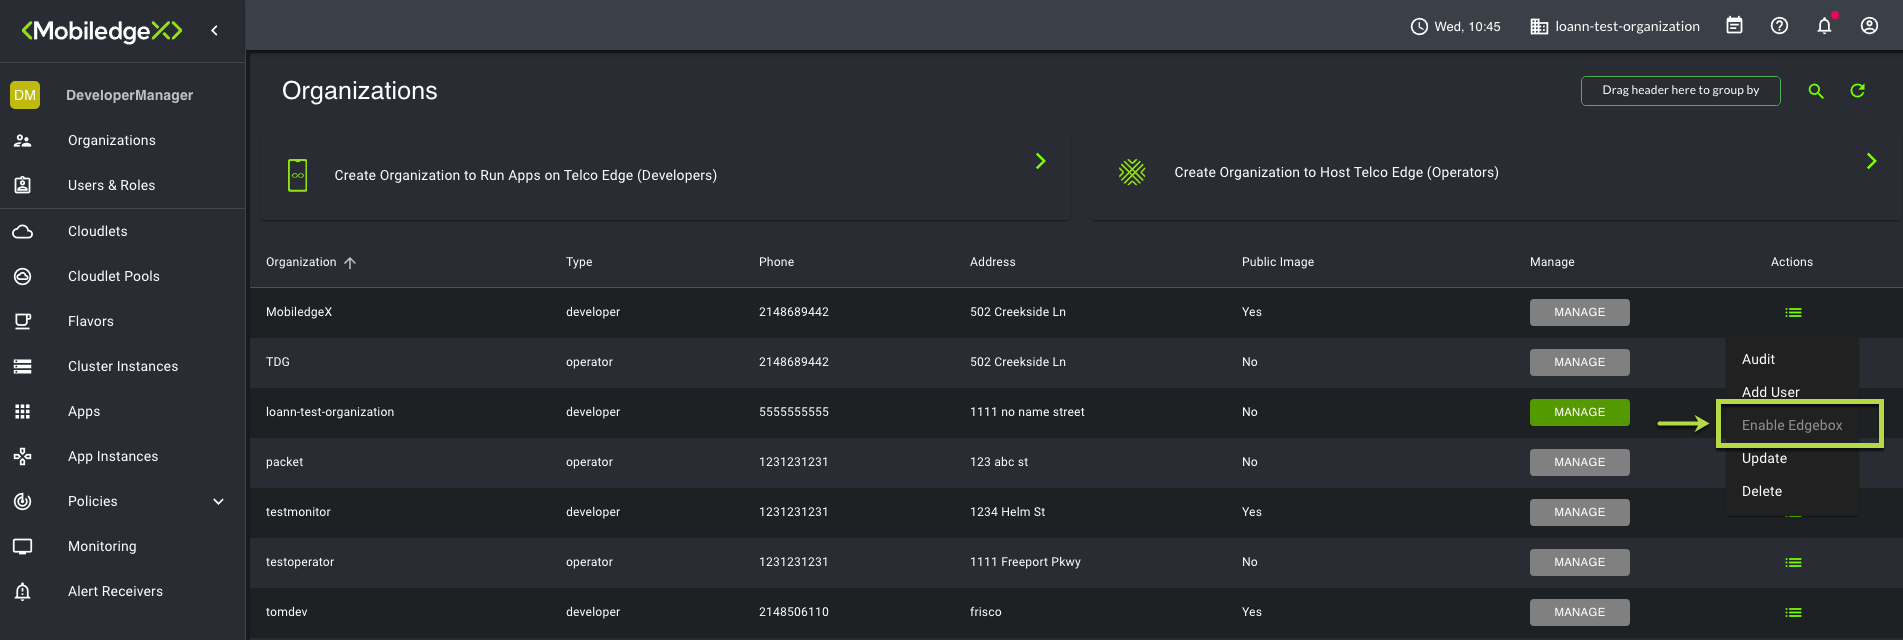
You may add developer or operator users to your organization at any time either during or after creating your organization. However, members of your organization, by default, will not have permissions to create cloudlets. For more information, see the section on Disabling Edgebox.
You must create an organization upon logging into the console for the first time. Additional organizations may be formed once the initial organization is built. Organization names must be all one word, with no spaces or special characters.
Note: It is best practice to keep the name of your organizations all in lower-case.
After logging onto the Edge-Cloud Console, the first screen that appears is the Organizations screen. This screen is where you can add your organizations and users.
To add an organization
Step 1: From the Organizations screen, select the arrow corresponding to Create Organization to Host Telco Edge.

The Create Organization page opens.

Step 2: For Organization Name, type in the name of your organization. Observe the naming convention rules as mentioned earlier.
Step 3: Type in an address and phone number, and select Create. The Step 2 Add User page opens.

Step 4: You can start adding your users and assigning them roles, or skip this step and return to it later.
Note: The right-side of the screen lists the available roles you can assign your users. Select the Role box to open up the dropdown menu, which will allow you to assign users an applicable role.
Step 5: Select Add User.
Step 6: To confirm that your user(s) was added, select Users & Roles on the left-navigation.

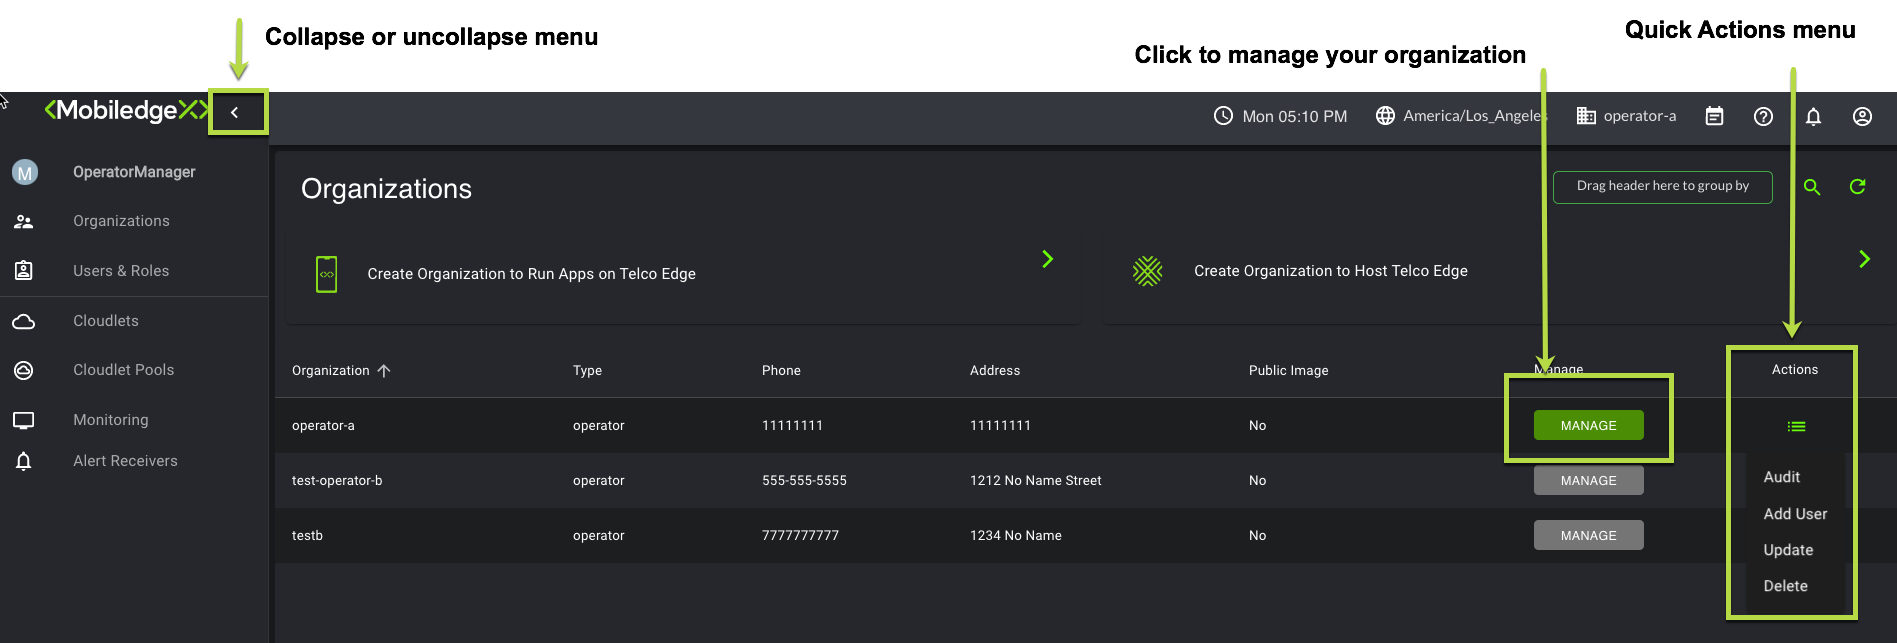
Although your organization is listed, it's currently not managed. Select the Manage button associated with the organization you would like to manage. Remember to perform this step each time you log into the Edge-Cloud Console. Selecting Manage for your organization ensures you are working within the correct organization. Additionally, selecting Manage displays all the available submenus on the left navigation pane. However, to expand or collapse the submenus, select the icon as shown in the image below.
Next to the Manage button is an Actions menu where you can perform such tasks such as Audit, Add User, Update and Delete your organization.

Disabling Edgebox
As mentioned earlier, organization members will not be able to create cloudlets until you contact EdgeXR Admin. Currently, the UI provides a Disable Edgebox option which will require a EdgeXR Admin to manually disable. Once that is complete, members of your organizations will be able to create cloudlets.

Users and roles
You can view users and their associated roles that were added to your organizations. The Users & Roles page lists all users, roles, and associated organizations they were assigned.
The following actions may be performed on this page, depending on you role within the organization:
In the Search bar, type in the first few letters of your search to filter your search.
From the Actions menu, select the Actions icon and select Delete from the dropdown to delete the user.

Assign role-based access control (RBAC)
Role-based access control provides varying levels of access specified by the user's role and responsibilities. Setting the user's roles and responsibilities requires establishing permissions and privileges, consequently, enabling access for authorized users. EdgeXR provides three different levels of RBAC with varying privileges, as outlined below. Note that specifying RBAC for each user is performed within the Organization page.
Role | Privileges |
|---|---|
Operator Manager |
|
Operator Contributor |
|
Operator Viewer |
|
For OperatorManager and OperatorContributor, contact [email protected] to obtain access to the create cloudlet page.